About Me

- ebilfairy
- Hi I'm Sandra (also go by ebilfairy) I'm 38. Living with my parents, younger sister, her daughter Bella and one dog called Kiki.
Sunday, 13 May 2012
FTU Tutorial - So Punked Off!
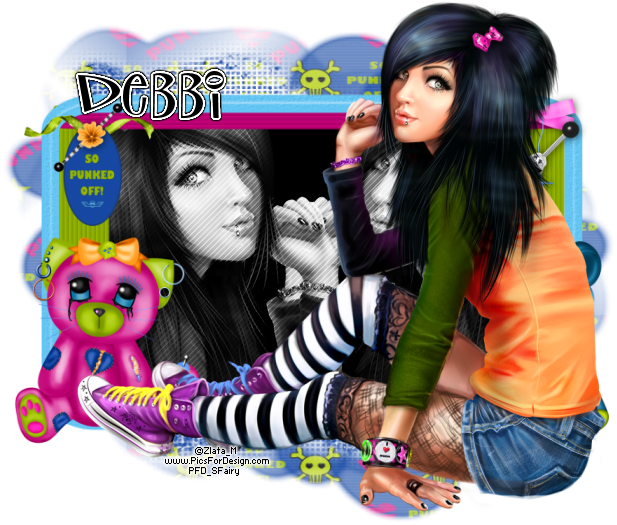
This tutorial was written by me on 13th May 2012 any resemblance to other tutorials is a coincidence.
*****
Supplies
FTU Scrapkit by Kittz called So Punked Off!!!!
Tube of choice I'm using the art of Zlata M you must have a license to use this tube. You can purchase it at PicsForDesign
Font P22 Sniplash
*****
Lets Get Going
Open a new canvas 650 x 650
Paste SPO-Frame2 as a new layer - resize 90%
Magic Wand Tool - click inside the frame
Selections - Modify - Expand 5
Layers - New Raster Layer - Floodfill #000000
Layer - Arrange Move Down
Paste tube as a new layer
Selections - Invert - Press the small delete key to remove excess tube.
Selections - Select None
Duplicate the tube layer - Image Mirror.
Layers - Merge - Merge Down - Change the blend mode to Luminance(Legacy)
Effects - Artistic Effects - Half Tone

Paste tube as a new layer - Move to the top of the frame - Resize to liking.
Layers - New Raster Layer
Selection - Select All - Paste 09paper Into Selection.
Layers - Arrange - Move Down
Layers - New Mask Layer - From Image
Use the Deform to get the mask how you like it.
Layers - Merge - Merge Visible
Resize to liking.
Add your name & copyright info.
Save as png.
FTU Tutorial - Angelic
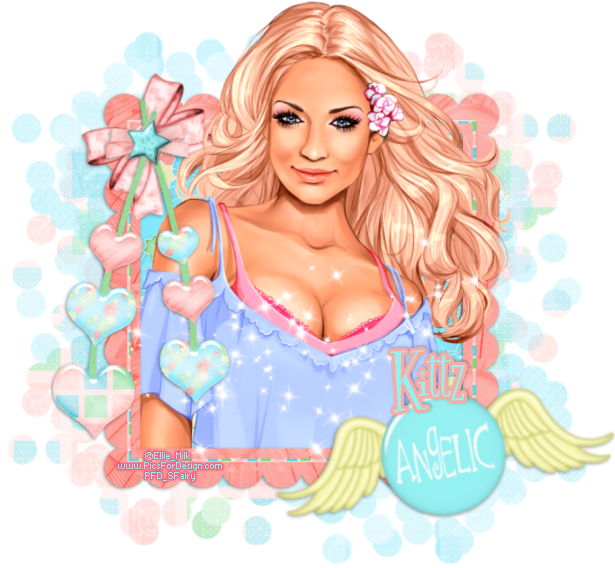
This tutorial was written by me on 13h May 2012 any resemblance to other tutorials is a coincidence.
*****
Supplies
FTU scrapkit by Kittz called Angel Kisses
Tube of choice I used the art of Ellie Milk you can must have a license to use this tube,
You can purchase it at PicsForDesign
Font Fontdinerdotcom Sparkly
*****
Lets Get Going
Open a new canvas 650 x650
Paste GB-Square Scalloped Frame as a new layer.
Magicwand click inside the frame.
Selections - Modify - Expand by 5.
Paste GB-P7 as a new layer.
Layers - Arrange - Move Down.
Selections - Invert - Press the small delete key to remove paper outside of frame.
Paste your tube as a new layer - If your using the same tube as me I resized 75%
Duplicate tube - Layers - Arrange Move up.
Back on the original tube press the small delete key.
Selections - Select None.
On the duplicate layer - use the eraser tool to remove the bottom part of the tube.
(should look like she's coming out of the frame now)
Paste GB-Sparkles as a new layer - resize 90%
Paste GB-Heart String as a new layer - resize 85%
Paste gGB-Angelic Brad with Wings as a new layer - resize 65% - Image - Free Rotate 10% left.
Layers - Merge - Merge Visible.
Layers - New Raster Layer.
Selections - Select All
Paste GB-P14 into selection
Selections - Select None
Layers - Arrange - Move Down
Layers - Load Mask From Image find Vix_Mask178 in the dropdown box.
Layers - Resize 80%
Move down to the left - Duplicate - Image Flip - move to the right.
Layers - Merge - Merge Down - Lower the opacity to 50%
Repeate the Mask steps using GB-P10 (mirror when finished)
Add your name & copyright info
Save as png
Friday, 4 May 2012
FTU Tutorial - Dark Angel
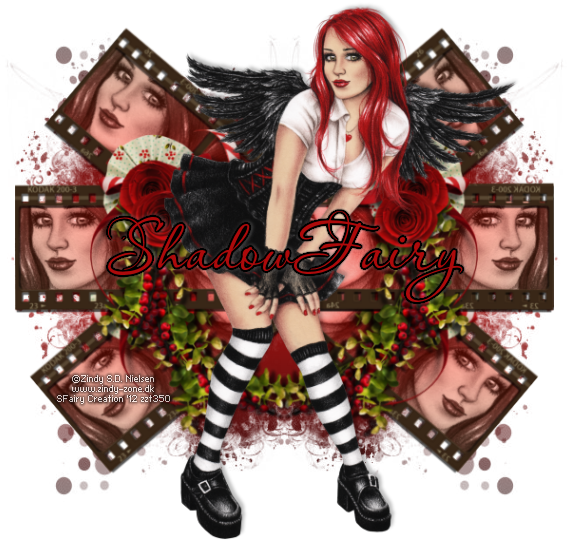
This tutorial was written by me on 4th May 2012 any resemblance to other tutorials is a coincidence.
*****
Supplies
Tube of choice I used the beautiful art of Zindy S.D Nielsen
Vix_Mask450 by Vix
Font PassionsConflictROB
*****
Lets Get Going
New Canvas 650 x 650
Paste RRD_EK_LoveLivesHere cluster B as a new layer
Resize - 50% - 50% 70%
Selection Tool - draw around the frame.
New Raster layer
Floodfill with a gradient of choice I used
Foreground #ad0a0b - Background #3c2a19
Angle 45 - Repeats 1
Magic wand click inside the left square of the frame.
Selections - Modify - Expand by 2
Paste close up tube as a new layer.
Move around till you have something you like showing inside the frame.
Selections - Invert - Press the small delete key/ use your eraser tool to get rid of excess tube.
Selections - Select None
Layers - Arrange - Move down.
Layers - Duplicate
Image - Mirror
Layers Duplicate - use your move tool to move the tube into the frame beside your 1st tube layer.
Layers - Duplicate - Image - Mirror.
Merge the 4 tube layers together - change the blend mode to Luminance Legacy
Layers -Merge - Merge Visible
Layers - Duplicate - Image - Rotate - Free Rotate Left 40
Layers - Arrange - Move Down
Layers - Duplicate - Image - Mirror
Back on the top layer
Layers Duplicate - Image Mirror
Selection Tool - Rectangle Draw - starting from the left draw around the 1st two frames of the frame
Press delete
Selections - Invert - back on the original frame - press delete.
Hopefully you'll have what looks like a U in the middle of your frames.
Merge - Merge Visible
Layers - Duplicate - Chaneg the blend mode to soft light.
Paste your tube as a new layer - dupliacte - blend mode to soft light.
Layers New Raster Layer
Floodfill with a gradient of choice - same colors as before but change the angle to 0 & repeats 1
Layers - New Mask for Image - Find Vix_Mask431 in the drop down box.
Layers - Merge - Visible
Add your name & copyright
Save as png.
Subscribe to:
Posts
(Atom)
My Blinkie
I CT For