About Me

- ebilfairy
- Hi I'm Sandra (also go by ebilfairy) I'm 38. Living with my parents, younger sister, her daughter Bella and one dog called Kiki.
Monday, 6 August 2012
FTU Tutorial - Heartbreaker


This tutorial was written by me on 6th of August 2012
any resemblance to other tutorials is a coincidence.
*****
Supplies
Tube of Choice - I used the awesome art of Arthur Crowe. You must have a licence to use his tubes. You can purchase them at Arthur Crowes Factory
Template 35 by Dave at Spawns Forum Set Templates
Font Heartbreaker (hence the name of the tag lol)
Plugins
Alien Skin Eye Candy 5 - Swirls
Dsb Flux - Bright Noise
Xero Effects - Fritillary
*****
Lets Start
Open up SpawnsFSTemplate035
Press shift+D to duplicate - close off the original.
Close off all the layers. I'm working from bottom to top.
Open Main Background (colorize if you like)
Open Black Lines
Paste your close up as a new layer - duplicate twice.
Position how you like or as in my example.

Merge the 3 tube layers together.
Change the blend mode to Luminance Legacy - Lower Opacity to 50%
Duplicate - Adjust Blur - Gaussian Blur 3 - Blend Mode to Soft Light.
Bottom Wave
Adjust - Color Balance - Manual Color Correction.

Source color (#c0c0c0) Target Color (color from your tube)
Effects - EyeCandy 5 - Texture - Swirl

Effects - Xero - Fritillary

Bottom Wave Line
Adjust - Color Balance - Manual Color Correction.
Source color (#ffffff) Target Color (color from your tube)
Effects - Dsb Flux - Bright Noise

Top Wave
Adjust - Color Balance - Manual Color Correction.
Source color (#c0c0c0) Target Color (color from your tube)
Effects - Eye Candy 5 - Texture - Swirl

Top Wave Line
Adjust - Color Balance - Manual Color Correction.
Source color (#ffffff) Target Color (color from your tube)
Effects - Dsb Flux - Bright Noise - Same settings as before.
Paste your tube as a new layer - Position where you like it.
Duplicate - Adjust - Blur - Gaussian Blur 3 - blend mode Overlay - Opacity 50%
Add a dropshadow of choice to the original tube.
New Raster Layer
Selections - Select All - Floodfill with color of choice.
Selections - Modify - Contract by 2 - floodfill with another color - contract by 2
Press the small delete key.
Selections - Select None.
Add your copyright, name and save as JPEG.
Avatar
Open a new canvas 120 x 145
Copy your tag and paste it as a new layer on the avatar canvas.
Move it around until you have something you like showing.
Image - Add Borders

Image - Add Borders
Change the color to the 2nd color in your Forum Set.
Add your name and copyright, save as JPEG
Sunday, 15 July 2012
FTU Tutorial - Be Mine
This tutorial was written by me on 15th July 2012
any resemblance to other tutorials is a coincidence.
*****
Supplies
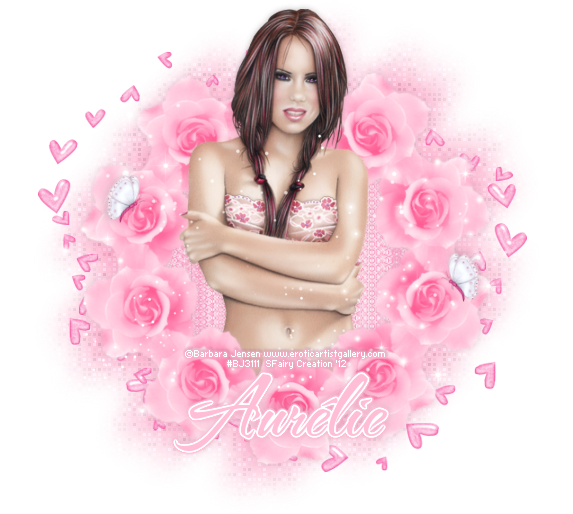
Tube of choice I'm using the art of Barbara Jensen, you must have a licence to use her art.
You can buy Barbara's tubes here.
Scrapkit is FTU by Pink Candy Scraps called Be Mine.
Font of choice - I used TheNautiGal.
*****
Lets Start
New canvas - 600 x 600
Paste Flower as a new layer
Resize 95%
Effects - MuRa's Filter - Copies
(click the image to in large it)

You should now have a frame of Flowers
Layers - duplicate
Adjust - Blur - Gaussian Blur 3
Change the blend mode to Multiply - lower the opacity to 66
Layers - Merge - Merge Visible.
Layers - Duplicate - close off the duplicate frame for now.
Back on the original.
Adjust - Blur - Gaussian Blur 20.
Effects - xero - Fritillary

Effects - Image Effects - Offset

Duplicate -Image - Mirror - Image - Flip
Paste Doodles as a new layer
Effects - Image Effects - Offset - Down and Left Streaks

Image - Effects - Offset

Layers - Duplicate
Image - Mirror

(Add a drop shadow if you like, I didn't)
Layers - Merge - Merge Visible
Unhide the copy of Flower Frame.
Magic wand - click in the center of the Flower frame
Selections - Modify - Expand by 15
Paste Paper7 as a new layer
Selections - Invert - Press delete (removes excess paper)
Layers - Arrange - Move down.
(before I added my tube I duplicated it - adjust blur - gaussian blur 3, blend mode overlay, opacity 30 - Layers - Merge - Merge Visible)
Paste tube as a new layer - duplicate - close off one copy for now.
Press the small delete key - Selections - Select None.
Unhide the duplicate tube.
Layers - Arrange - Bring to top.
Use your Eraser tool to remove any of the tube outside the frame.
Add any elements you like.
I used
Butterfly 20%
Sparkles 90%
Add name & copyright - save as png
Wednesday, 13 June 2012
FTU Tutorial - Kimono Of Spring

This tutorial was written by me on 13th June 2012 any resemblance to other tutorials is a coincidence.
*****
Supplies
Kimono of Spring Collab by Jennys Designz
I used a gorjuss checks brush to make the background, but you can use a mask of choice if you prefer.
Font of choice I used Passions Conflict ROB
*****
Lets Start
New canvas 650 x 650
Paste frame6 as a new layer
Magicwand - Click inside both sides of the frame.
Selections - Modify - Expand 3 - Selections - Invert
Paste paper1 as a new layer - press the small delete key on your keyboard (or use your eraser tool)
Move the paper layer below the frame layer.
Paste close up as a new layer. Move it under the right frame.
Press the small delete key on your keyboard (or use your eraser tool)
Selections - Select None.
Change the opacity to Luminance(Legacy)
Magicwand - Click inside the left frame - Selections - Modify 3
Paste your tube as a new layer - move it below the frame layer.
Duplicate the tube and move above the frame.
Back on the original - press the small delete key.
Selections - Select None.
Back on the duplicate tube layer - use your eraser tool and remove the bottom of the tube.
(so it looks like she is coming out of the frame)
Make sure your on the top layer.
Paste flowers as a new layer - resize 50% repeat.
Move flowers so it's sat at the left corner of the frame.
Layes - Duplicate - Image - Mirror - Image - Flip
Paste bird as a new layer - Image - resize 20% - 40%.
Layers - Merge - Merge Visible.
If your using a mask
Layers - New Raster Layer - floodfill with a color of choice.
Layers - New Mask - Layer From Image.
Layers - Arrange - Move Down
If your using a brush
Layers - New Raster Layer
Layers - Arrange - Move Down
Select a color from your tag and stamp the brush to your liking.
Resize to your liking.
Add your copyright and name.
Save as png
Subscribe to:
Posts
(Atom)
My Blinkie

I CT For


