About Me

- ebilfairy
- Hi I'm Sandra (also go by ebilfairy) I'm 38. Living with my parents, younger sister, her daughter Bella and one dog called Kiki.
Saturday, 15 October 2011
FTU tutorial - Gothic Halloween

This tutorial was written by me on 15th of October 2011
*Supplies*
Scrapkit by Kittz at KittzKreationz it's called Gothic Halloween
Tagtemplate416 by Missy at Divine Intentionz
Tube of choice. I'm using the awesome work of Ismael Rac
Font Lainie Day
*****
*Lets Get Going*
Open Missy template in PSP
Press Shift + D to duplicate it & close off the original.
Delete copyright, thin rectangle1 & 2, star1 & 2, frame, circle back & Copy of circle back.
Image - Canvas Size 750x500
square3
Selections - Select All - Float - Defloat.
Copy & paste paper GH-P8 as a new layer.
Image - Resize 70%
Selections - Invert - Press the small delete key on your keyboard.
Selections - Select None.
Delect square3
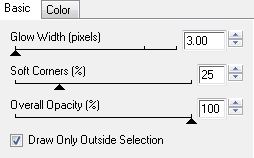
Effects - Eyecandy 4000 - Gradient Glow

square1
Selections - Select All - Float - Defloat.
Copy & paste paper GH-P4 as a new layer.
Image - Resize 70%
Selections - Invert - Press the small delete key on your keyboard.
Selections - Select None.
Delete square1
Effects - Eyecandy 4000 - Gradient Glow Same settings as before.
square2
Selections - Select All - Float - Defloat.
Copy & paste paper GH-P7 as a new layer.
Image - Resize 70%
Selections - Invert - Press the small delete key on your keyboard.
Selections - Select None.
Delete square2
Effects - Eyecandy 4000 - Gradient Glow Same settings as before.
rounded edge rectangle
Selections - Select All - Float - Defloat.
Copy & paste paper GH-P5 as a new layer.
Image - Resize 80%
Selections - Invert - Press the small delete key on your keyboard.
Selections - Select None.
Delete square2
Effects - Eyecandy 4000 - Gradient Glow Same settings as before.
rounded edge rectangle2
Adjust - Color Balance - Manual Color Correction
Source Color #fa66be - Target Color #bd0000
Effects - Texture Effects - Weave

Effects - Eyecandy 4000 - Gradient Glow Same settings as before.
circle center
Selections - Select All - Float - Defloat.
Copy & paste paper GH-P3 as a new layer.
Image - Resize 70%
Selections - Invert - Press the small delete key on your keyboard.
Selections - Select None.
Delete circle center
Effects - Eyecandy 4000 - Gradient Glow Same settings as before.
frame back
Selections - Select All - Float - Defloat.
Copy & paste paper GH-P6 as a new layer.
Selections - Invert - Press the small delete key on your keyboard.
Selections - Select None.
Delete frame back
Effects - Eyecandy 4000 - Gradient Glow Same settings as before.
circle right
Selections - Select All - Float - Defloat.
Copy & paste paper GH-P6 as a new layer.
Selections - Invert - Press the small delete key on your keyboard.
Copy & paste yoru close up as a new layer.
Change the blend mode to Luminance Legecy and lower the opacity to 64%
Selections - Select None.
Delete frame back
Effects - Eyecandy 4000 - Gradient Glow Same settings as before.
circle left
Selections - Select All - Float - Defloat.
Copy & paste paper GH-P6 as a new layer.
Selections - Invert - Press the small delete key on your keyboard.
Change the blend mode to Luminance Legecy and lower the opacity to 64%
Selections - Select None.
Delete circle left
Effects - Eyecandy 4000 - Gradient Glow Same settings as before.
Layers - Merge - Merge Visible.
Copy & paste your main tube as a new layer.
Add any elemenets you like I used.
GH-Star Ribbon
GH-Lights 90%
GH-Goth Swirl
GH-Cat 60%
GH-KITTY 50%
GH-Wizard Frog 50%
GH-Horned Pumpkin 50% then 90%
Resize tag to liking.
Add copyright and name.
Save as png for transparent background / jpeg for white background.
Subscribe to:
Posts
(Atom)
My Blinkie

I CT For


