About Me

- ebilfairy
- Hi I'm Sandra (also go by ebilfairy) I'm 38. Living with my parents, younger sister, her daughter Bella and one dog called Kiki.
Tuesday, 27 November 2012
PTU Tutorial - With Love

This tutorial was written by me on 27th November 2012 any resemblance to other tutorials is a coincidence.
*****
Supplies
EI Template121 by Pooker at Elegant Inspirations
Tube is by Zindy S.D Nielsen.
You must have a licence to use this tube but she has some gorgeous FTU tubes as well so go check them out.
Scrapkit is sold with the tube at Zindy's store, it's called With Love Collection.
Font - Inspiration
Lets Get Started
Delete Cr Info, Orange Dotted Circles & Dotted Lines layers.
Image - Resize 82%
Black Circle2
Layers - Merge - Merge Down.
Selctions - Select All - Float - Defloat.
Layers - New Raster Layer.
Copy CBJ_WLC_Paper11 - Paste Into Selection.
Selections - Select None.
Delete Black Circles.
Black Circle1
Selections - Select All - Float - Defloat.
Layers - New Raster Layer.
Copy CBJ_WLC_Paper11 - Paste Into Selection.
Selections - Select None.
Delete Black Circle1
Black Circle4
Layers - Merge - Merge Down
Selctions - Select All - Float - Defloat.
New Raster Layer.
Copy CBJ_WLC_Paper11 - Paste Into Selection.
Selections - Select None.
Delete Black Circles.
White Circle1
Laters - Merge - Merge Down.
Selections - Select All Float - Defloat.
New Raster Layer.
Copy CBJ_WLC_Paper9 - Paste Into Selection.
Selections - Invert - Press the small delete key.
Selections - Select None.
Delete the White Circles.
Dk Grey Circle1
Layers - Merge - Merge Down.
Selections - Select All - Float - Defloat.
Copy CBJ_WLC_Paper16 - Paste As New Layer.
Selections - Invert - Press the small delete key.
Selections - Select None.
Delete the DK Grey Circles.
Orange Circle
Selections - Select All - Float - Defloat.
New Raster Layer.
Copy CBJ_WLC_Paper12 - Paste Into Selection.
Selections - Select None.
Delete the Orange Circle Layer.
Orange Rectangle
Selections - Select All - Float - Defloat.
New Raster Layer.
Copy CBJ_WLC_Paper12 - Paste Into Selection.
Selections - Select None.
Delete Orange Rectangle Layer.
White Circl3
Selections - Select All - Float - Defloat.
New Raster Layer
Copy CBJ_WLC_Paper3 - Paste Into Selection.
Selections - Select None.
Delete White Circl3
Copy CBJ_WLC_Vines - Paste As New Layer
Image - Resize 50%
See my tag for placement.
Copy CBJ_WLC_Rose3 - Paste As New Layer.
Image - Resize 50%
See my tag for placement.
Copy CBJ_WLC_WingedHearts - Paste As New Layer.
See my tag for placement.
Copy CBJ_WLC_Petals - Paste As New Layer.
Image - Rotate - Free Rotate.
Image - Mirror
Image - Resize 55%
Copy CBJ_WLC_Rose - Paste As New Layer.
Image - Resize 50%
See my tag for placement.
Copy CBJ_WLC_LoveCharm - Paste As New Layer
Image - Resize 50%
See my tag for placement.
Copy CBJ_WLC_Wording - Paste As New Layer.
Image - Resize 50%
Copy your tube - Paste As New Layer.
If your using the same tube as me there is no need to resize.
I used the sparkles from another kit.
If your happy with how your tag looks
Add your copyright & Name.
Layers - Merge - Merge Visible.
Save as Png.
*****
If you want to get the same effect on as I have on my tag.
Layers - Merge - Merge Visible.
Layers - Duplicate.
Effects - Xero - Radiance - Default settings.
Adjust - Blur - Gaussian Blur 3.
Change the blend mode to Screen - Lower Opacity 60%.
Add your copyright & Name.
Layers - Merge - Merge Visible.
Save as Png.
Monday, 6 August 2012
FTU Tutorial - Heartbreaker


This tutorial was written by me on 6th of August 2012
any resemblance to other tutorials is a coincidence.
*****
Supplies
Tube of Choice - I used the awesome art of Arthur Crowe. You must have a licence to use his tubes. You can purchase them at Arthur Crowes Factory
Template 35 by Dave at Spawns Forum Set Templates
Font Heartbreaker (hence the name of the tag lol)
Plugins
Alien Skin Eye Candy 5 - Swirls
Dsb Flux - Bright Noise
Xero Effects - Fritillary
*****
Lets Start
Open up SpawnsFSTemplate035
Press shift+D to duplicate - close off the original.
Close off all the layers. I'm working from bottom to top.
Open Main Background (colorize if you like)
Open Black Lines
Paste your close up as a new layer - duplicate twice.
Position how you like or as in my example.

Merge the 3 tube layers together.
Change the blend mode to Luminance Legacy - Lower Opacity to 50%
Duplicate - Adjust Blur - Gaussian Blur 3 - Blend Mode to Soft Light.
Bottom Wave
Adjust - Color Balance - Manual Color Correction.

Source color (#c0c0c0) Target Color (color from your tube)
Effects - EyeCandy 5 - Texture - Swirl

Effects - Xero - Fritillary

Bottom Wave Line
Adjust - Color Balance - Manual Color Correction.
Source color (#ffffff) Target Color (color from your tube)
Effects - Dsb Flux - Bright Noise

Top Wave
Adjust - Color Balance - Manual Color Correction.
Source color (#c0c0c0) Target Color (color from your tube)
Effects - Eye Candy 5 - Texture - Swirl

Top Wave Line
Adjust - Color Balance - Manual Color Correction.
Source color (#ffffff) Target Color (color from your tube)
Effects - Dsb Flux - Bright Noise - Same settings as before.
Paste your tube as a new layer - Position where you like it.
Duplicate - Adjust - Blur - Gaussian Blur 3 - blend mode Overlay - Opacity 50%
Add a dropshadow of choice to the original tube.
New Raster Layer
Selections - Select All - Floodfill with color of choice.
Selections - Modify - Contract by 2 - floodfill with another color - contract by 2
Press the small delete key.
Selections - Select None.
Add your copyright, name and save as JPEG.
Avatar
Open a new canvas 120 x 145
Copy your tag and paste it as a new layer on the avatar canvas.
Move it around until you have something you like showing.
Image - Add Borders

Image - Add Borders
Change the color to the 2nd color in your Forum Set.
Add your name and copyright, save as JPEG
Sunday, 15 July 2012
FTU Tutorial - Be Mine
This tutorial was written by me on 15th July 2012
any resemblance to other tutorials is a coincidence.
*****
Supplies
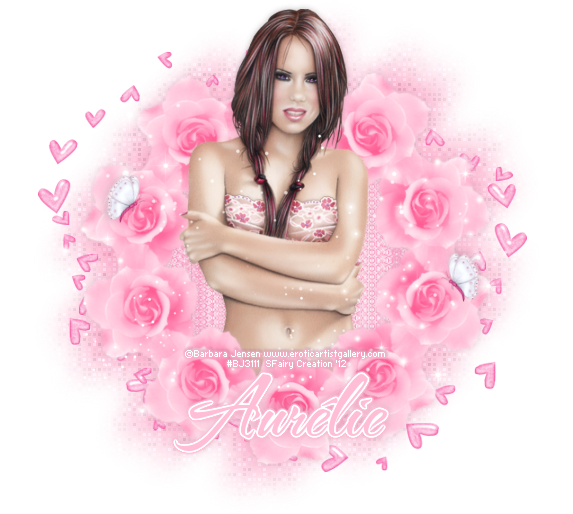
Tube of choice I'm using the art of Barbara Jensen, you must have a licence to use her art.
You can buy Barbara's tubes here.
Scrapkit is FTU by Pink Candy Scraps called Be Mine.
Font of choice - I used TheNautiGal.
*****
Lets Start
New canvas - 600 x 600
Paste Flower as a new layer
Resize 95%
Effects - MuRa's Filter - Copies
(click the image to in large it)

You should now have a frame of Flowers
Layers - duplicate
Adjust - Blur - Gaussian Blur 3
Change the blend mode to Multiply - lower the opacity to 66
Layers - Merge - Merge Visible.
Layers - Duplicate - close off the duplicate frame for now.
Back on the original.
Adjust - Blur - Gaussian Blur 20.
Effects - xero - Fritillary

Effects - Image Effects - Offset

Duplicate -Image - Mirror - Image - Flip
Paste Doodles as a new layer
Effects - Image Effects - Offset - Down and Left Streaks

Image - Effects - Offset

Layers - Duplicate
Image - Mirror

(Add a drop shadow if you like, I didn't)
Layers - Merge - Merge Visible
Unhide the copy of Flower Frame.
Magic wand - click in the center of the Flower frame
Selections - Modify - Expand by 15
Paste Paper7 as a new layer
Selections - Invert - Press delete (removes excess paper)
Layers - Arrange - Move down.
(before I added my tube I duplicated it - adjust blur - gaussian blur 3, blend mode overlay, opacity 30 - Layers - Merge - Merge Visible)
Paste tube as a new layer - duplicate - close off one copy for now.
Press the small delete key - Selections - Select None.
Unhide the duplicate tube.
Layers - Arrange - Bring to top.
Use your Eraser tool to remove any of the tube outside the frame.
Add any elements you like.
I used
Butterfly 20%
Sparkles 90%
Add name & copyright - save as png
Wednesday, 13 June 2012
FTU Tutorial - Kimono Of Spring

This tutorial was written by me on 13th June 2012 any resemblance to other tutorials is a coincidence.
*****
Supplies
Kimono of Spring Collab by Jennys Designz
I used a gorjuss checks brush to make the background, but you can use a mask of choice if you prefer.
Font of choice I used Passions Conflict ROB
*****
Lets Start
New canvas 650 x 650
Paste frame6 as a new layer
Magicwand - Click inside both sides of the frame.
Selections - Modify - Expand 3 - Selections - Invert
Paste paper1 as a new layer - press the small delete key on your keyboard (or use your eraser tool)
Move the paper layer below the frame layer.
Paste close up as a new layer. Move it under the right frame.
Press the small delete key on your keyboard (or use your eraser tool)
Selections - Select None.
Change the opacity to Luminance(Legacy)
Magicwand - Click inside the left frame - Selections - Modify 3
Paste your tube as a new layer - move it below the frame layer.
Duplicate the tube and move above the frame.
Back on the original - press the small delete key.
Selections - Select None.
Back on the duplicate tube layer - use your eraser tool and remove the bottom of the tube.
(so it looks like she is coming out of the frame)
Make sure your on the top layer.
Paste flowers as a new layer - resize 50% repeat.
Move flowers so it's sat at the left corner of the frame.
Layes - Duplicate - Image - Mirror - Image - Flip
Paste bird as a new layer - Image - resize 20% - 40%.
Layers - Merge - Merge Visible.
If your using a mask
Layers - New Raster Layer - floodfill with a color of choice.
Layers - New Mask - Layer From Image.
Layers - Arrange - Move Down
If your using a brush
Layers - New Raster Layer
Layers - Arrange - Move Down
Select a color from your tag and stamp the brush to your liking.
Resize to your liking.
Add your copyright and name.
Save as png
Sunday, 13 May 2012
FTU Tutorial - Sweet Like Candy

This tutorial was written by me on 13th May 2012 any resemblance to other tutorials is a coincidence.
*****
Supplies
FTU scrapkit by Kittz called Candy Treats
Tube of Choice I'm using the art of Elias Chatzouids, you must have a license to use his art. You can purchase his tubes at Elias Art Shop
(I bought my tubes while he was at PTE which has now closed)
(I bought my tubes while he was at PTE which has now closed)
Font of choice.
Mask of choice
(I know I hate when people say that but I really can't remember what masked I used sorry but I think it was a Vix Mask)
*****
Lets Get Going
Open a new canvas 650 x 650
Selections - Select All - Paste CT-P4 Into Selection
Layers - New Mask Layer - From Image
Find your mask in the drop down box.
Paste CT-Sweet Double Frame as a new layer - resize 90%
Magic Want Tool click inside the right side of the frame - Selctions - Modify 5
Paste your close up tube as a new layer- positing so something you like is showing in the frame.
Selections - Invert - Press the small delete key to remove tube outside frame.
Selections - Select None.
Layers - Arrange - Move Down.
Duplicate the tube layer - Adjust - Blur - Gaussian Blur 3 - Blend mode - Opacity 80%
Magic Wand Tool click inside the left side of the frame.
Selections - Modify 5
Paste CT-P3 as a new layer - Selections - Invert - Press the small delete key.
Layers - Arrange - Move Down.
Paste main tube as a new layer - Dupliacate
Layers - Arrange - Move Up
Selections - Invert - Press the small delete key (on the original tube)
Selections - Select None
On the duplicate tube use the eraser tool to remove the bottom half so it looks like the tube is coming out of the frame.
Merge Visible
Add any elements you like. I added
CT-Pearls
f3 resize 75%
CT-Sweet Kitty 50%
Resize
Add your name & copyright info
Save as png.
FTU Tutorial - So Punked Off!

This tutorial was written by me on 13th May 2012 any resemblance to other tutorials is a coincidence.
*****
Supplies
FTU Scrapkit by Kittz called So Punked Off!!!!
Tube of choice I'm using the art of Zlata M you must have a license to use this tube. You can purchase it at PicsForDesign
Font P22 Sniplash
*****
Lets Get Going
Open a new canvas 650 x 650
Paste SPO-Frame2 as a new layer - resize 90%
Magic Wand Tool - click inside the frame
Selections - Modify - Expand 5
Layers - New Raster Layer - Floodfill #000000
Layer - Arrange Move Down
Paste tube as a new layer
Selections - Invert - Press the small delete key to remove excess tube.
Selections - Select None
Duplicate the tube layer - Image Mirror.
Layers - Merge - Merge Down - Change the blend mode to Luminance(Legacy)
Effects - Artistic Effects - Half Tone

Paste tube as a new layer - Move to the top of the frame - Resize to liking.
Layers - New Raster Layer
Selection - Select All - Paste 09paper Into Selection.
Layers - Arrange - Move Down
Layers - New Mask Layer - From Image
Use the Deform to get the mask how you like it.
Layers - Merge - Merge Visible
Resize to liking.
Add your name & copyright info.
Save as png.
FTU Tutorial - Angelic

This tutorial was written by me on 13h May 2012 any resemblance to other tutorials is a coincidence.
*****
Supplies
FTU scrapkit by Kittz called Angel Kisses
Tube of choice I used the art of Ellie Milk you can must have a license to use this tube,
You can purchase it at PicsForDesign
Font Fontdinerdotcom Sparkly
*****
Lets Get Going
Open a new canvas 650 x650
Paste GB-Square Scalloped Frame as a new layer.
Magicwand click inside the frame.
Selections - Modify - Expand by 5.
Paste GB-P7 as a new layer.
Layers - Arrange - Move Down.
Selections - Invert - Press the small delete key to remove paper outside of frame.
Paste your tube as a new layer - If your using the same tube as me I resized 75%
Duplicate tube - Layers - Arrange Move up.
Back on the original tube press the small delete key.
Selections - Select None.
On the duplicate layer - use the eraser tool to remove the bottom part of the tube.
(should look like she's coming out of the frame now)
Paste GB-Sparkles as a new layer - resize 90%
Paste GB-Heart String as a new layer - resize 85%
Paste gGB-Angelic Brad with Wings as a new layer - resize 65% - Image - Free Rotate 10% left.
Layers - Merge - Merge Visible.
Layers - New Raster Layer.
Selections - Select All
Paste GB-P14 into selection
Selections - Select None
Layers - Arrange - Move Down
Layers - Load Mask From Image find Vix_Mask178 in the dropdown box.
Layers - Resize 80%
Move down to the left - Duplicate - Image Flip - move to the right.
Layers - Merge - Merge Down - Lower the opacity to 50%
Repeate the Mask steps using GB-P10 (mirror when finished)
Add your name & copyright info
Save as png
Friday, 4 May 2012
FTU Tutorial - Dark Angel

This tutorial was written by me on 4th May 2012 any resemblance to other tutorials is a coincidence.
*****
Supplies
Tube of choice I used the beautiful art of Zindy S.D Nielsen
Vix_Mask450 by Vix
Font PassionsConflictROB
*****
Lets Get Going
New Canvas 650 x 650
Paste RRD_EK_LoveLivesHere cluster B as a new layer
Resize - 50% - 50% 70%
Selection Tool - draw around the frame.
New Raster layer
Floodfill with a gradient of choice I used
Foreground #ad0a0b - Background #3c2a19
Angle 45 - Repeats 1
Magic wand click inside the left square of the frame.
Selections - Modify - Expand by 2
Paste close up tube as a new layer.
Move around till you have something you like showing inside the frame.
Selections - Invert - Press the small delete key/ use your eraser tool to get rid of excess tube.
Selections - Select None
Layers - Arrange - Move down.
Layers - Duplicate
Image - Mirror
Layers Duplicate - use your move tool to move the tube into the frame beside your 1st tube layer.
Layers - Duplicate - Image - Mirror.
Merge the 4 tube layers together - change the blend mode to Luminance Legacy
Layers -Merge - Merge Visible
Layers - Duplicate - Image - Rotate - Free Rotate Left 40
Layers - Arrange - Move Down
Layers - Duplicate - Image - Mirror
Back on the top layer
Layers Duplicate - Image Mirror
Selection Tool - Rectangle Draw - starting from the left draw around the 1st two frames of the frame
Press delete
Selections - Invert - back on the original frame - press delete.
Hopefully you'll have what looks like a U in the middle of your frames.
Merge - Merge Visible
Layers - Duplicate - Chaneg the blend mode to soft light.
Paste your tube as a new layer - dupliacte - blend mode to soft light.
Layers New Raster Layer
Floodfill with a gradient of choice - same colors as before but change the angle to 0 & repeats 1
Layers - New Mask for Image - Find Vix_Mask431 in the drop down box.
Layers - Merge - Visible
Add your name & copyright
Save as png.
Monday, 16 April 2012
FTU Tutorial - Sweet Tina
This tutorial was written by me on 15th April 2012 any resemblance to other tutorials is a coincidence.
*****
Supplies
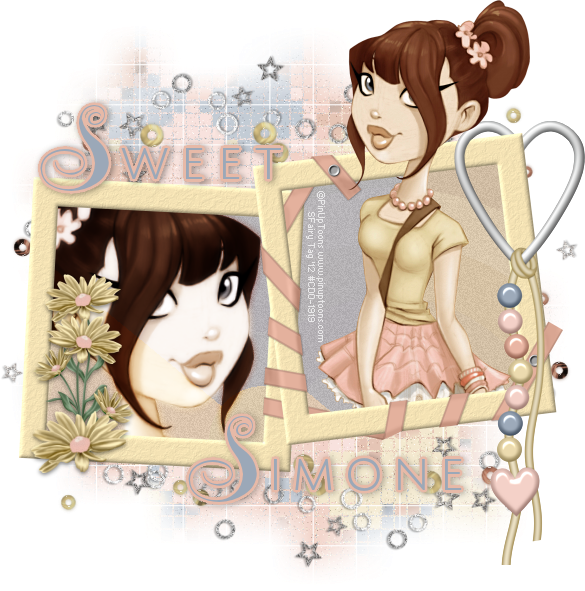
Scrapkit Tina's Look by Simone at Scrappy Bit of Fun
Tube of choice I'm using PinUpToons you must have a licence to use this tube. You can purchase it at CDO
Mask WSL_Mask84 by weescotslass
Font of choice - I used VIP.
*****
Lets Get Started
New Canvas 650x650
Selections - Select All - Copy & paste LH_Tina'sLook_Paper-005 into selection.
Selections - Select None.
Layers - New Mask Layer from Image - Find WSL_Mask84 in the dropdown box.

Paste LH_Tina'sLook_Element-027 as a new layer - Image Resize 90%
Paste LH_Tina'sLook_Element-023 as a new layer - move down a bit
Layers - Duplicate - Image flip - Mirror.
Paste LH_Tina'sLook_Frame-001 as a new layer
Freehand Selection Tool draw around the frame

Paste a paper of choice a new layer (I used LH_Tina'sLook_Paper-007)
Paste the close up tube as a new layer - move so it's inside the left frame.
Paste the medium sized tube as a new layer - move so her head is outside of the frame.
Duplicate tube - close off for now.
Selections - Invert - press the small delete key on Paper & tubes layers.
Selections - Select None
You should have something like the screen shot below.

Duplicate the close up tube layer.
On the original layer - change the blend mode to Luminance(Legacy)
On the duplicate layer - Adjust - Blur - Gaussian Blur 3
Change the blend mode to Overlay & lower the opacity to 80%
Unhide the copy of medium sidzed tube.
Layers - Arrange - Bring to top.
Using your eraser tool erase the bottom part of the tube
So that it looks like she is sitting inside the frame.
Add any other elements you like.
Resize to you liking, then add copyright & name.
Save as png.
Sunday, 15 April 2012
PTU Tutorial - Angels
This tutorial was written by me on 15th April 2012 any resemblance to other tutorials is a coincidence.
*****
Supplies
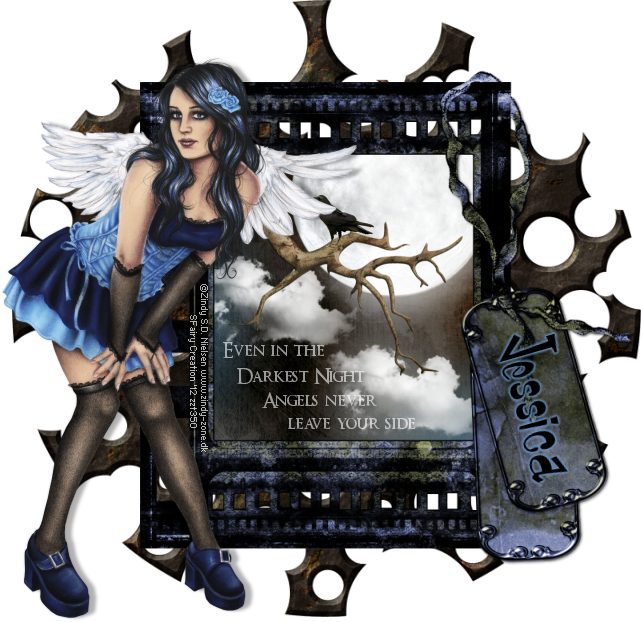
Tube of choice I'm using the art of Zindy S. D. Nielsen you must have a license to use her art.
Scrapkit The Darkest Night by Gothic Inspirations
Font of choice I used Monstroula.
My word art (it's a png so just right click and save)

Let's Start
File - New - 650 x 650
Copy & paste TagBack as a new layer - Resize 90%
Copy & paste Frame2 as a new layer - Resize 80% - move so it sits over the Tagback.
Magic Wand Tool - click insie the frame (make sure you click in the ribbon as well)
Selections - Modify - Expand 5
Selections - Invert - Copy & paste paper4 as a new layer
Image - Resize 50%
Layers - Arrange - Move Down.
Press the small delete key to get rid of excess paper.
Copy & paste Moon as a new layer
Image - Resize 60% - place at the top/side of the frame (see my tag for refrence)
Press the small delete key to get rid of excess Moon.
Copy & paste Cloud as a new layer - Image - Resize 30%
place to the left of the frame - duplicate - move down & to the right.
Copy & paste Branch as a new layer
Image - Resize 55% - place to the left of the frame (see my tag for reference)
Copy & paste Crow as a new layer - Image - resize 30% & 30% - place so it's sitting on the branch
Selections - Select None.
Add any words you like or use my word art.
Copy & paste your tube as a new layer - place to the left of the frame
Resize to your liking.
Add your name & copyright then save as png.
FTU Tutorial - Sweetheart

This tutorial was written by me on 15th April 2012 any resemblance to other tutorials is a coincidence.
*****
Supplies
Tube of choice I used the gorgeous art of Keith Garvey here.
Template116 by Rachel at Scraps of Enchantment
Scrapkit is FTU by Jenny's Designz it's called Sweetheart.
Font of choice.
*****
Lets Start
Open templat116 in PSP - press SHIFT+D to duplicate it - close off the original.
Delete the copyright layer.
OvalBackground
Selections - Select All - Float - Defloat
Paste Paper7 into selection
Selections - Select None.
OvalFrame
Copy & paste Flower1 as a new layer
Resize 50% then 50% again.
See my tag for placement.
Duplicate Flower1 - Image - Mirror - Flip
BackgroundRight
Selections - Select All - Float - Defloat
Paste paper6 as a new layer
Paste paper6 as a new layer
Image - Resize 30% - 50%
Copy & paste your close up tube as a new layer.
Selections - Invert - press the small delete key on the paper & tube layers.
(this removes the excess stuff outside the frame)
Selections - Select None
Duplicate the tube
On the original layer change the blend mode to Luminance(Legacy)
Blend mode of the duplicate tube Screen & lower the opacity to 70%
BackgroundLeft
Repete the steps you used for BackgroundRight
HeartBrush1
Selections - Select All - Float - Defloat
New Raster Layer - Paste paper10 into selection
Delete HeartBrush1 - Selections - Select None
HeartBrush2
Repeat the steps used for HeartBrush1
Copy & paste your tube as a new layer. Resize to your liking.
Layer - Merge - Merge Visible
Add your name - copyright and any other elements you like.
Subscribe to:
Posts
(Atom)
My Blinkie

I CT For


