About Me

- ebilfairy
- Hi I'm Sandra (also go by ebilfairy) I'm 38. Living with my parents, younger sister, her daughter Bella and one dog called Kiki.
Monday, 16 April 2012
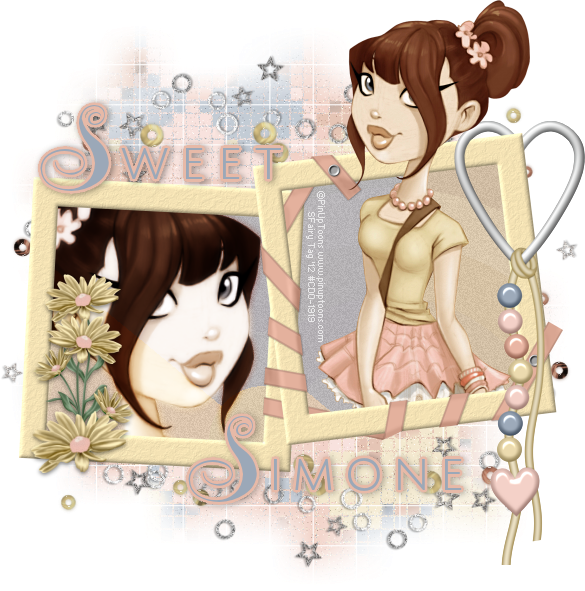
FTU Tutorial - Sweet Tina
This tutorial was written by me on 15th April 2012 any resemblance to other tutorials is a coincidence.
*****
Supplies
Scrapkit Tina's Look by Simone at Scrappy Bit of Fun
Tube of choice I'm using PinUpToons you must have a licence to use this tube. You can purchase it at CDO
Mask WSL_Mask84 by weescotslass
Font of choice - I used VIP.
*****
Lets Get Started
New Canvas 650x650
Selections - Select All - Copy & paste LH_Tina'sLook_Paper-005 into selection.
Selections - Select None.
Layers - New Mask Layer from Image - Find WSL_Mask84 in the dropdown box.

Paste LH_Tina'sLook_Element-027 as a new layer - Image Resize 90%
Paste LH_Tina'sLook_Element-023 as a new layer - move down a bit
Layers - Duplicate - Image flip - Mirror.
Paste LH_Tina'sLook_Frame-001 as a new layer
Freehand Selection Tool draw around the frame

Paste a paper of choice a new layer (I used LH_Tina'sLook_Paper-007)
Paste the close up tube as a new layer - move so it's inside the left frame.
Paste the medium sized tube as a new layer - move so her head is outside of the frame.
Duplicate tube - close off for now.
Selections - Invert - press the small delete key on Paper & tubes layers.
Selections - Select None
You should have something like the screen shot below.

Duplicate the close up tube layer.
On the original layer - change the blend mode to Luminance(Legacy)
On the duplicate layer - Adjust - Blur - Gaussian Blur 3
Change the blend mode to Overlay & lower the opacity to 80%
Unhide the copy of medium sidzed tube.
Layers - Arrange - Bring to top.
Using your eraser tool erase the bottom part of the tube
So that it looks like she is sitting inside the frame.
Add any other elements you like.
Resize to you liking, then add copyright & name.
Save as png.
Sunday, 15 April 2012
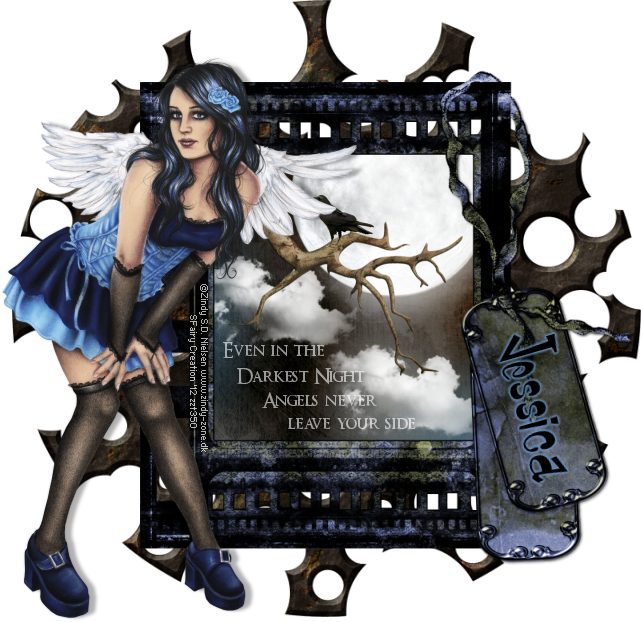
PTU Tutorial - Angels
This tutorial was written by me on 15th April 2012 any resemblance to other tutorials is a coincidence.
*****
Supplies
Tube of choice I'm using the art of Zindy S. D. Nielsen you must have a license to use her art.
Scrapkit The Darkest Night by Gothic Inspirations
Font of choice I used Monstroula.
My word art (it's a png so just right click and save)

Let's Start
File - New - 650 x 650
Copy & paste TagBack as a new layer - Resize 90%
Copy & paste Frame2 as a new layer - Resize 80% - move so it sits over the Tagback.
Magic Wand Tool - click insie the frame (make sure you click in the ribbon as well)
Selections - Modify - Expand 5
Selections - Invert - Copy & paste paper4 as a new layer
Image - Resize 50%
Layers - Arrange - Move Down.
Press the small delete key to get rid of excess paper.
Copy & paste Moon as a new layer
Image - Resize 60% - place at the top/side of the frame (see my tag for refrence)
Press the small delete key to get rid of excess Moon.
Copy & paste Cloud as a new layer - Image - Resize 30%
place to the left of the frame - duplicate - move down & to the right.
Copy & paste Branch as a new layer
Image - Resize 55% - place to the left of the frame (see my tag for reference)
Copy & paste Crow as a new layer - Image - resize 30% & 30% - place so it's sitting on the branch
Selections - Select None.
Add any words you like or use my word art.
Copy & paste your tube as a new layer - place to the left of the frame
Resize to your liking.
Add your name & copyright then save as png.
FTU Tutorial - Sweetheart

This tutorial was written by me on 15th April 2012 any resemblance to other tutorials is a coincidence.
*****
Supplies
Tube of choice I used the gorgeous art of Keith Garvey here.
Template116 by Rachel at Scraps of Enchantment
Scrapkit is FTU by Jenny's Designz it's called Sweetheart.
Font of choice.
*****
Lets Start
Open templat116 in PSP - press SHIFT+D to duplicate it - close off the original.
Delete the copyright layer.
OvalBackground
Selections - Select All - Float - Defloat
Paste Paper7 into selection
Selections - Select None.
OvalFrame
Copy & paste Flower1 as a new layer
Resize 50% then 50% again.
See my tag for placement.
Duplicate Flower1 - Image - Mirror - Flip
BackgroundRight
Selections - Select All - Float - Defloat
Paste paper6 as a new layer
Paste paper6 as a new layer
Image - Resize 30% - 50%
Copy & paste your close up tube as a new layer.
Selections - Invert - press the small delete key on the paper & tube layers.
(this removes the excess stuff outside the frame)
Selections - Select None
Duplicate the tube
On the original layer change the blend mode to Luminance(Legacy)
Blend mode of the duplicate tube Screen & lower the opacity to 70%
BackgroundLeft
Repete the steps you used for BackgroundRight
HeartBrush1
Selections - Select All - Float - Defloat
New Raster Layer - Paste paper10 into selection
Delete HeartBrush1 - Selections - Select None
HeartBrush2
Repeat the steps used for HeartBrush1
Copy & paste your tube as a new layer. Resize to your liking.
Layer - Merge - Merge Visible
Add your name - copyright and any other elements you like.
Subscribe to:
Posts
(Atom)
My Blinkie

I CT For


