About Me

- ebilfairy
- Hi I'm Sandra (also go by ebilfairy) I'm 38. Living with my parents, younger sister, her daughter Bella and one dog called Kiki.
Showing posts with label Elias Chatzoudis. Show all posts
Showing posts with label Elias Chatzoudis. Show all posts
Monday, 8 August 2016
IB EliasChatzoudis 72-2 CT Timeline Set


Tuesday, 11 February 2014
PTU Tutorial - Catch me a Leprechaun

This tutorial was written by me on 11th of February 2014 any resemblance to other tutorials is a coincidence.
*****
*Supplies*
Scrapkit Ole Irish Charm by P-O Concept you can purchase it
Tube of choice I am using Sexy Patty by Elias Chatzoudis.
You must have a license to use this tube - you can purchase it here.
Template KanDee-stpats-2013_2 here.
Vix_BigMask001 here.
*****
*Lets Get Started*
Open in PSP - Press SHIFT+D to duplicate it - close off the original.
Delete Copyright and gold shamrocks layers.
*
Selections - Select All.
Copy PO-olpp9 - Paste - Paste Into Selection.
Selections - Select None.
Layers - New Mask Layer - From Image.

Click OK.
Layers - Merge - Merge Group.
*
green arch insert
Selections - Select All - Float - Defloat
Copy PO-olpp1 - Paste - Paste As New Layer.
Selections - Invert - Press the small delete key.
Selections - Select None.
Change the blend mode to Overlay.
*
top dark green circle
Adjust - Color Balance - Manual Color Correction

Selections - Select All - Float - Defloat
Copy close up tube - Paste - Paste As New Layer.
Move so that what you like is showing inside the circle.
Selections - Invert - Press the small delete key.
Selections - Select None.
Change the blend mode to Luminance(Legacy)
Layers - Duplicate - Adjust - Blur - Gaussian Blur 3.
Change the blend mode to Soft Light.
Copy PO-ol23 - Paste - Paste As New Layer.
Move so that it's sitting over the green circle like a frame.
*
orange shape
Selections - Select All - Float - Defloat.
Copy PO-olpp25 - Paste - Paste As New Layer.
Selections - Invert - Press the small delete key.
Selections - Select None.
*
dark green frame
Effects - 3D Effects - Inner Bevel

*
green center shape
Selections - Select All - Float - Defloat
Copy PO-olpp13 - Paste - Paste As New Layer.
Selections - Invert - Press the small delete key.
Change the blend mode to Overlay.
Copy PO-ol102 - Paste - Paste As New Layer.
Adjust - Blur - Gaussian Blur 3.
Copy close up of tube again.
Place to the right of the green shape - press the small delete key again.
Selections - Select None.
Layers - Duplicate.
Image - Mirror.
Layers - Merge - Merge Down.
Change the blend mode to Luminance(Legacy)
Layers - Duplicate
Adjust - Blur - Gaussian Blur 3
Change the blend mode to Overlay and lower the opacity to 30%.
*
small green circle
Layers - New Raster Layer.
Selections - Select All - Float - Defloat.
Copy PO-ol69 - Paste - Paste Into Selection.
Selections - Select None.
Delete small green circle.
Go to the top layer.
Copy your tube - Paste - Paste As New Layer.
Place where you think it looks best.
Other elements I used are
PO-ol9
PO-ol6 - Rotated
PO-ol36
PO-ol28
*
Resize to your liking.
Add your name and copyright.
Save as png.
Saturday, 25 January 2014
FTU Tutorial - Happy

This tutorial was written by me on 25th of January 2014 any resemblance to other tutorials
is a coincidence.
*****
*Supplies*
Scrapkit called My Punk Hannah at Scrap Rebellion here.
Tube of choice I'm using the art of Elias Chatzoudis you must have a license to use this tube,
you can purchase the tubes here.
Font Happy Sans.
Wordart by me just right click and save as png.

Feel free to colourise to your liking - or use your own wordart.
*****
*Lets Get Started*
File - New - New Image 600x600
Copy frame3 - Paste As New Layer
Magic Wand - click inside the frame (hold the shift key) make sure you get the 2 frames selected.
Selection - Modify - Expand by 3.
Copy a paper of choice (I used 7) - Paste As New Layer.
Selections - Invert - Press the small delete key.
Selections - Select None.
Layers - Arrange - Moved Down.
Should have something like this now.

Magic Wand - click inside the black frame.
Selections - Modify - Expand by 3
Selections - Invert - Press the small delete key.
Selections - Invert.
Layers - Arrange - Move Down.
Should have something like this now.

Copy your tube - Paste As New Layer.
Arrange it where you think it looks best.
Selections - Promote Selection to Layer.
Selections - Select None.
Move the whole tube layer up so it's on top of the frame.
Eraser Tool - remove any of the tube outside the bottom of frame.
(skip the last few steps if you don't want your tube coming out of the frame like mine)
Copy the wordart - Paste As New Layer
Move into position
Layers - Arrange - Send to Bottom
Add your copyright and name.
Save as png or JPEG.
Sunday, 13 May 2012
FTU Tutorial - Sweet Like Candy
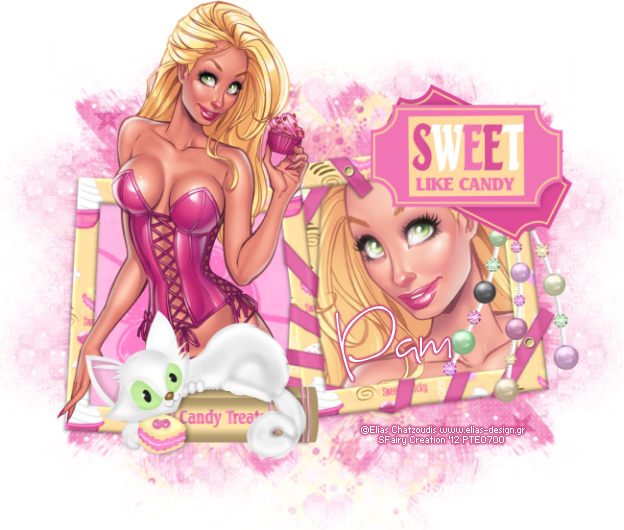
This tutorial was written by me on 13th May 2012 any resemblance to other tutorials is a coincidence.
*****
Supplies
FTU scrapkit by Kittz called Candy Treats
Tube of Choice I'm using the art of Elias Chatzouids, you must have a license to use his art. You can purchase his tubes at Elias Art Shop
(I bought my tubes while he was at PTE which has now closed)
(I bought my tubes while he was at PTE which has now closed)
Font of choice.
Mask of choice
(I know I hate when people say that but I really can't remember what masked I used sorry but I think it was a Vix Mask)
*****
Lets Get Going
Open a new canvas 650 x 650
Selections - Select All - Paste CT-P4 Into Selection
Layers - New Mask Layer - From Image
Find your mask in the drop down box.
Paste CT-Sweet Double Frame as a new layer - resize 90%
Magic Want Tool click inside the right side of the frame - Selctions - Modify 5
Paste your close up tube as a new layer- positing so something you like is showing in the frame.
Selections - Invert - Press the small delete key to remove tube outside frame.
Selections - Select None.
Layers - Arrange - Move Down.
Duplicate the tube layer - Adjust - Blur - Gaussian Blur 3 - Blend mode - Opacity 80%
Magic Wand Tool click inside the left side of the frame.
Selections - Modify 5
Paste CT-P3 as a new layer - Selections - Invert - Press the small delete key.
Layers - Arrange - Move Down.
Paste main tube as a new layer - Dupliacate
Layers - Arrange - Move Up
Selections - Invert - Press the small delete key (on the original tube)
Selections - Select None
On the duplicate tube use the eraser tool to remove the bottom half so it looks like the tube is coming out of the frame.
Merge Visible
Add any elements you like. I added
CT-Pearls
f3 resize 75%
CT-Sweet Kitty 50%
Resize
Add your name & copyright info
Save as png.
Monday, 13 February 2012
FTU Tutorial - Summer Wave

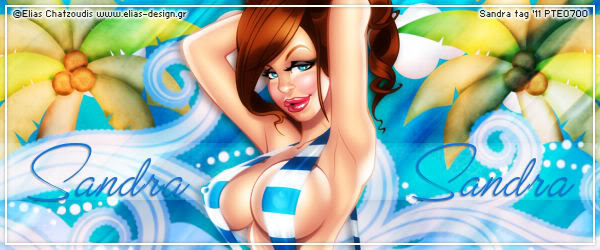
Supplies
I'm using a kit from Seachell's Sacrpz called Splish Splash.
(Kit is unfortunately no longer available)
(Kit is unfortunately no longer available)
Tube of choice - I'm using one by Elias Chatzouids.
You must have a license to use his art. You can purchase his tubes at Elias Art Shop
(I bought my tubes while he was at PTE which has now closed)
(I bought my tubes while he was at PTE which has now closed)
Font Valentina JF
Filters
Muras Meister Copies
*****
Lets Get Started
Open a new canvas 600x250
Copy & paste paper 2 as a new layer.
Copy & paste element 23 as a new layer - resize 70%e -place near the top of the canvas.
Copy & paste element 38 as a new layer - resize 40% - move to the left of your canvas.
Layers - duplicate - Image - mirror - layers - merge - merge visible.
Copy & paste element 20 as a new layer - resize 65% - move to the bottom of your canvas.
Copy & paste your tube as a new layer - effects - MuRas miester - Copies.
 Adjust - Blur - Motion Blur
 Change the blend mode to overlay.
Preset shape - retangle and draw out a rectangle 600x50 - move near the bottom of your canvas - change the blend mode to soft light.
Copy & paste your tube again and place where you think it looks best.
Layers duplicate - adjust - blur - gaussian blur 3 change the blend mode to overlay.
Add a drop shadow to your bottom tube

Layers - New raster layer - layers - arrange bring to top.
Selections - select all - selections - modify - contract by 5 - flood fill with white (or a color from your tube)
Selections - modify - contract 2 - press the small delete key on your keyboard - drop shadow.
Add your name and copyright.
Layers - merge - merge all flatten.
Save as JPEG.
Avatar
New canvas 150 x 150
Copy and paste your tag as a new layer - Image mirror.
Move about until you have something you like showing.
Layers - New raster layer.
Selections - select all - selections modify - contract 5 - flood fill with white.
Selections - modify - contract 2 - press the small delete key and you should have a frame.
Add your name and copyright - save as JPEG.
**Update 2016**
This is my result for the tut using a kit called Popsicle Smiles by Sheila at DigiTee.
And here is the cluod I made cos there is none in the kit.


**Update 2016**
This is my result for the tut using a kit called Popsicle Smiles by Sheila at DigiTee.
And here is the cluod I made cos there is none in the kit.
FTU Tutorial - Shine

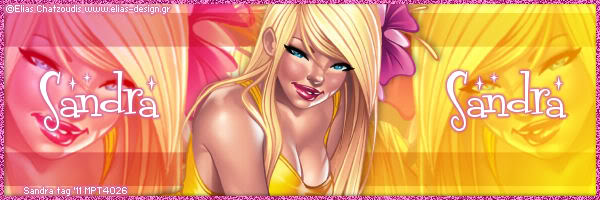
*Supplies*
Tube of choice I'm using the beautiful art of Elias Chatzoudis. You must have a licence to use his work, you can purchase his tubes from Elias Art Shop
(I bought my tubes while he was at PTE which has now closed)
(I bought my tubes while he was at PTE which has now closed)
Font of choice I'm using Fontdinerdotcom Sparkly
*Plugins*
MuRa's Meister - Copies this is a free to use plugin, if you don't already have it Google it you should find a link to download it.
*****
*Lets Tag*
File - New 600 x 200
Make a forgorund/background gradient from 2 color in your tube
I used #f27b9e and #ac6640 - Angle 45 - Repeats 0
floodfill your canvas.
Copy & paste your tube as a new layer.
Effects - MuRa's Meister - copies - wallpaper rotate
change the blend mode of this layer to Overlay.
Copy & paste your close up tube - move to the left of your canvas
duplicate the tube - image mirror.
Merge the 2 close up layers together - change the blend mode to overlay and lower the opacity to 74
Layers - merge - merge all flatten.
Preset shape tool - draw a rectangle using your gradient 600 x 35
move the rectangle to the top of your canvas (see mine for placement)
layers - duplicate - image - flip
merge the 2 rectangle layers together - change the blend mode to multiply and lower the opacity to 60%
Copy & paste your main tube as a new layer and move where you think looks best.
Layers - merge - merge all flatten.
Layers - new raster layer
selections - select all - floodfill with a color from your tube I used #bf3359
selections modify - contract by 4 - press the small delete key on your keyboard (should get rid of the middle block of color)
selections select none
adjust - add/remove noise - add noise - 70 Uniform - Monochrome checked
Add your copyright and name - save as JPEG
Avatar
File - New 150 x 150
copy & paste your completed tag onto the avatar canvas and move around till you have something you like showing.
Layers - merge - merge all flatten.
Layers - new raster layer
Selections - select all - floodfill with the color you used for the tag.
Selections - modify - contract by 3 - press the small delete key to get rid of excess color.
Selections - select none.
adjust - add/remove noise - add noise - 70 Uniform - Monochrome checked
Layers - merge - merge all flatten.
Add your copyright and name
Save as Jpeg
Sunday, 12 February 2012
FTU Tutorial - Naughty Angel

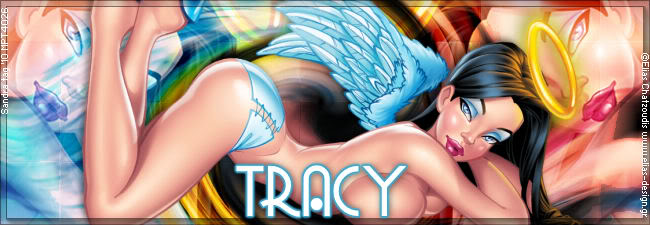
This tutorial was written by me on 12th February 2012.
*Supplies*
*Supplies*
Tube of choice I'm using the art of Elias Chatzoudis. You must have a licence to use his work.
You can purchase his tubes at Elias Art Shop
(I bought my tubes while he was at PTE which has now closed)
(I bought my tubes while he was at PTE which has now closed)
Font of choice I used GradoGradooNF.
Plugins
Eye Candy4000 - Gradient Glow.
*****
*Lets get started*
File - New - 650 x 225
Copy and paste your close up tube as a new layer.
Duplicate it so that it fills the canvas.
Duplicate it so that it fills the canvas.
Adjust - blur - motion blur

Effects - Distortion Effects - Twirl

Image - flip - image - mirror - layers - duplicate.
On the duplicated layer - effects - xero - fritillary

Change the blend mode to overlay and lower the opcity to 30%
Copy and paste your close up tube as a new layer - move to the left.
Layers - Duplicate - Image - Mirror - Layers - Merge - Merge Down - change the blend mode to overlay.
Layers - Merge - Merge All Flatten.
Copy and paste your close up tube as a new layer - move to the left.
Layers - Duplicate - Image - Mirror - Layers - Merge - Merge Down - change the blend mode to overlay.
Layers - Merge - Merge All Flatten.
*****
Avatar
File - New - 150x150
Copy your tag background and paste as a new layer on your avatar canvas.
Move it around until you have something you want showing in the frame.
Copy and paste your tube as a new layer and move to where you think it looks best -Layers - Duplicate - Adjust - Blur - Gaussian blur 3.
Change the blend mode to overlay - lower the opacity to 30%.
Layers - merge - merge all flatten.
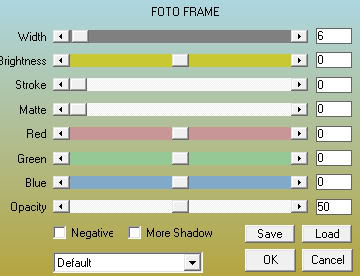
Effects - AAA Frame - Foto Frame
*****
Copy and paste your tube as a new layer and position where you think it looks best.
Layers - Duplicate - Adjust - Blur - Gaussian Blur 3.
Change the blend mode to overlay and lower the opacity to 30%
Add a drop shadow to the bottom tube layer
Copy and paste your tube as a new layer and position where you think it looks best.
Layers - Duplicate - Adjust - Blur - Gaussian Blur 3.
Change the blend mode to overlay and lower the opacity to 30%
Add a drop shadow to the bottom tube layer

Layers - merge - merge all flatten
Effects - AAA Frames - Foto Frame - same settings as used for avatar.
Add your name and copyright - save as JPEG.
FTU Tutorial - I know You Want Me Baby
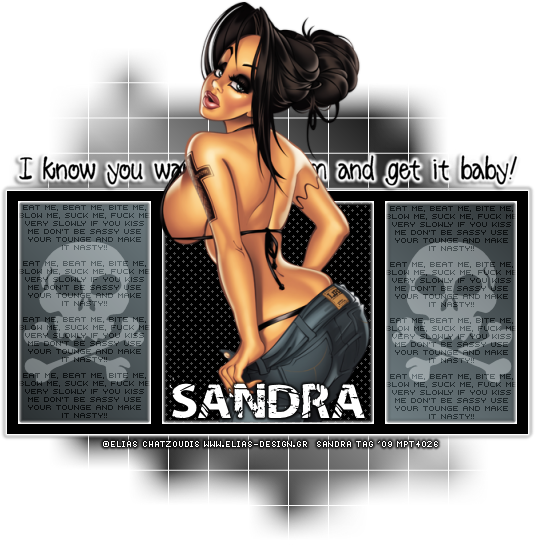
*Supplies*
Kristin - TD - Template 67
NeoTrash Font
Tube of choice I'm using the art of Elias Chatzoudis - you must have a license to use his art.
You can purchase the tubes at Elias Art Shop
(I bought my tubes while he was at PTE which has now closed)
*****
(I bought my tubes while he was at PTE which has now closed)
*****
*Let's Get Started*
Open template 67 in psp - press shift + D to duplicate - close off the original.
Delete - credits- stars - hearts - Words 2 - background
Image canvas size 600 x 600
Rectangles
Selections - select all - float - defloat
New raster layer - flood fill with the following gradient

Foreground #303638 - background #5d676c
Selections - select none
Square
Selections - select all - float - defloat
New raster layer - flood fill with #000000 (black)
Selections - select none.
Dots
Selections - select all - float - defloat
Flood fill with #ffffff
Selections - select none - lower the opacity to 50%
Frame
Effects - Eye candy 4000 - Gradient glow


Words3
Effects - Eye candy 4000 - Gradient glow
Same as before
Effects - 3D effects - drop shadow

Copy & paste your tube as a new layer
Place where you think it looks best
I resized mine by 80% smart size
Effects - 3D effects- drop shadow

Layers - merge - merge visible
New raster layer - flood fill with gradient we used at the beginning of the tut
Layers - new mask layer - from image
Find WSL_Mask84

Layers - merge- merge group
Layers - Arrange - send to the bottom
Add you name
I used NeoTrash size 36
I added a medium black gradient glow to make it stand out a bit more
Add your copyright - layers - merge- merge visible
Crop and resize to your liking.
Save as png or JPEG and we're done.
Friday, 30 September 2011
FTU Tutorial - Spider Girl


This tutorial was written by me on 25th September 2011.
It's a simple animation I wrote to help my friend Muriel learn animation.
*Supplies*
Tube by Elias Chatzoudis, you must have a license to use his art.
You can buy his tube at Elias Art Shop
Plugins
dsb flux - Spider Web - this a FTU plugin google it and you'll find a download.
*****
File - New - New Image 600 x 215
You can buy his tube at Elias Art Shop
Plugins
dsb flux - Spider Web - this a FTU plugin google it and you'll find a download.
*****
File - New - New Image 600 x 215
Pick 2 colors from your tube I used
Forground #c75f9e
Background #11161b
Angle 45
Repeats 3
Floodfill your canvas with the gradient
Layers - duplicate.
Copy & paste your close up tube as a new layer.
Position to the right.
Layers - Duplicate - Image - Mirrior
Layers - Merge - Merge Down.
Change the blend mode to Luminance(Legacy)
Lower the opacity to 54%
Preset Shape Tool - Rectangle
Draw out a rectangle 600x115
(easy way open new canvas sized 600 x 115 floodfill white then copy & paste onto tag)
place near the bottom of the tag.
Layers - Duplicate - Image - Image flip.
Layers - Merge - Merge Down.
Change the blend mode to overlay - lower the opacity to 70
Selections - select all - float - defloat - selections - invert
Back on your duplicate background layer press the small delete key.
Move back to the top layer
Paste your main tube as a new layer.
Layers - duplicate - adjust - blur - gaussian blur 3.
change the blend mode of the blured layer to overly.
New Raster Layer
Selections - select all
floodfill with black - selections - modify - contract 5
floodfille with #d555aa - selections - modify - contract 2
Press the small delete key.
You should now have a frame surrounding your tag.
Selections - select none.
Selections - select all - Image - crop selection
Add your copyright and name.
If you don't want to animate save as jpeg.
Animation
Open up Animation Shop
Back in PSP On your background layer
Effects - dsb flux - Spider Web

Edit - Copy Merged - paste as a new layer in Animation Shop.
Back in PSP
Edit - Undo Spider Web
Effects - Spider Web - same settings as before but change the number of Rays to 20
Edit - Copy Merged - Move to Animations Shop and Edit - Paste - After Current Frame.
Back in PSP
Edit - Undo Spider Web
Effects - Spider Web - same settings as before but change the number of Rays to 22
Edit - Copy Merged - Move to Animations Shop and Edit - Paste - After Current Frame.
View Animation and if happy save as gif
Avatar
125 x 175 copy merge tag as a new layer
Position so what you like is showing
Selections - select all
Floodfill black - selections - modify contract by 4
floodfil with #d555aa - selections - modify - contract by 2
Press the small delete key
Selections - select none.
Layers - merge - merge all flatten
Add your copyright and Name or Initial.
Save as jpeg
FTU Tutorial - Starlicious
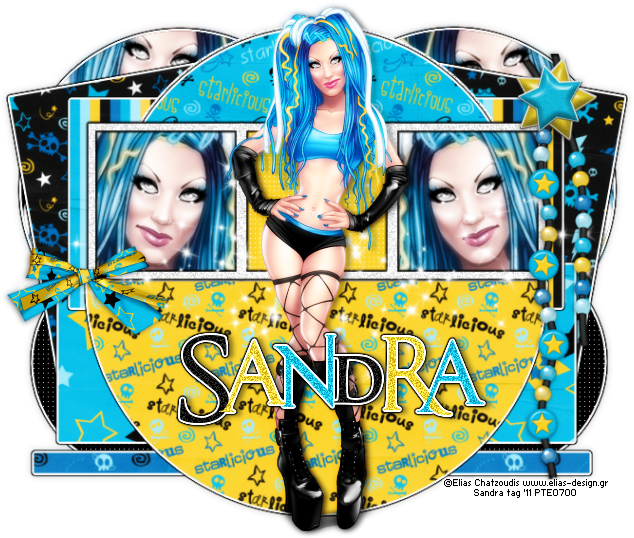
This tutorial was written by me on 25th September 2011
*Supplies*
Tagtemplate 382 from Missy at Divine Intentionz
Scrapkit Starlicious by Krstin at Toxic Desirez
Tube Elias Chatzouids - you must have a license to use his work.
You can buy Elias tubes at Elias Art Shop
Font An Unfortunate Event
Plugins
Eye Candy 4000 - Gradient glow
*****
*Lets Get Going*
Open template 382 in PSP - press shift+D to duplicate it and close off the original.
Delete copyright - dotted line - wordart - wordart back - raster 3 shadow and background.
Image - Canvas Size 700x600.
I'll be going from bottom to top.
Raster 2
Selections - float - defloat
Copy & paste your close up tube as a new layer. Position so that what you want is showing inside the circle.
Selections - Invert. Press the small delete key on your keyboard.(that should delete the excess tube)
Selections - select none.
Layers - duplicate. Adjust - blur - Gaussian Blur 3.

On the bottom tube change the blend mode to Luminance(Legacy)
Change the top tube blend mode to Overlay.
Back on Raster 2 - Effects - Eye Candy 4000 - Gradient Glow


Copy of Raster 2
Repeat all the steps we used for Raster 2
small circle & small circle2
Effects - Texture Effects - Weave

Effects - Eye Candy 4000 - Gradient Glow same settings as before.
thin rectangle
Selections - Float - Defloat
Copy & Paste a paper 12 as a new layer.
Selections - Invert - press the small delete key on your keyboard.
Selections - select none.
Effects - Gradient glow same settings as before.
Delete the original rectangle layer.
square
Selections - select all - float - defloat
Copy & paste paper16 as a new layer - resize 80%
Selections - Invert - press the small delete key.
Selections - select none.
Effects - Eyecandy Gradient Glow same settings as before.
Delete the original square layer.
Copy of square
Follow all the steps we used for square but use paper 11 instead of 12
rectangle
Selections - Select All - Float - Defloat
Copy & Paste paper 18 as a new layer - resize 80%
Selections - Invert - press the small delete key.
Effects - Gradient Glow
rectangle2
Selections - Select All - Float - Defloat
Copy & Paste paper 21 as a new layer - resize 80%
Selections - Invert - press the small delete key.
Effects - Gradient Glow same settings as before.
circle
Selections - Select All - Float - Defloat
Copy & Paste paper 8 as a new layer - resize 80%
Selections - Invert - press the small delete key.
Effects - Gradient Glow same settings as before.
half circle
Selections - Select All - Float - Defloat
Copy & Paste paper 10 as a new layer - resize 80%
Selections - Invert - press the small delete key.
Effects - Gradient Glow same settings as before.
Raster 1
With your magic wand click inside the left black square
copy & paste your close up tube as a new layer
Selections - Invert - press the small delete key.
Duplicate the tube - Image mirror & move it so that it sits inside the frame.
Merge the 2 tube layers together and then dupliacte again.
Adjust - Blur - Gaussian Blur - 3
Change the blend mode on the originals 2 Luminance (Legacy)
On the duplicate tube layer change the blend mode to overlay.
Raster 1
Click inside the middle pink square.
Adjust - Color Balance - Manual Color Correction
source #d92d8c - target #fbd135
Effects - Texture Effects - Weave
Selections - Select None
Frame
Adjust - Add/Remove Noise - Add Noise
Uniform 50 - Monochrome checked.
Effects - Gradient Glow

Copy & paste Starlicious Sparkles as a new layer
Copy & paste Bow 1 as a new layer - resize 50% - drop shadow - see tag for placement.
Copy & paste Beaded String as a new layer - resize 80% - dropshadow - see tag for placement.
Copy and paste Star 2 as a new layer - resize 50% - dropshadow - see tag for placement.
Copy & paste Star 1 as a new layer - Mirror - resize 45% - see tag for placement.
To make my tag brighter I merged layers visible - Resize 95%
Duplicated the whole tag.
Adjust - Blur - Gaussian Blur 3.
Change the blend mode to overlay & lower the opacity to 40%
If you don't want to do all that just - Merge Visible and resize 95%
Copy & paste your main tube as a new layer - position where you think it looks best.
Dublicate - Adjust - Blur - Gaussian Blur 3 - change the blend mode to overlay.
Add a drop shadow to the original tube layer
v0 - H2 - O30 - B5
Crop your canvas - add copyright and name.
Subscribe to:
Posts
(Atom)
My Blinkie
I CT For