About Me

- ebilfairy
- Hi I'm Sandra (also go by ebilfairy) I'm 38. Living with my parents, younger sister, her daughter Bella and one dog called Kiki.
Shout Out
Followers
Thursday, 15 March 2012
FTU Tutorial - Gothic Easter


*****
*Supplies*
Tube by SeleneVargo PicsForDesign
Fonts Impact - Babalu - pixelfont of choice for copyright.
*Plugins*
Eyecandy4000 - Gradient Glow
*****
Let the fun begin
New Canvas 620 x 200.
Make a gradient out of 2 colors from your tube.
I used - Foreground#b3020c
Background #3f7cad
Floodfill your canvas with the gradient.
Copy & paste your tube as a new layer - duplicate a few times & position where you like.
Screenshot of how I placed my tubes.
Unhide the background layer & change the blend mode of the tubes layer to luminance legacy.
Copy & Paste Vix_Texture5 as a new layer.
Change the belnd mode to Screen - lower the opacity to 80%.
Layers - Merge - Merge Visible.
With Font Impact size 24 type out GOTHIC EASTER
Move to the left (see my tag for refrence)
Duplicate - move to the right.
Layers - Merge - Merge the two word art layers together.
Dropshadow Vertical 3 - Horizontal -3 - Opacity 60 - Blur 5 - Color #000000.
Lower the opacity to 50% - Or play around with opacities & blend modes whatever you think looks best.
Layers - Merge - Merge Visible.
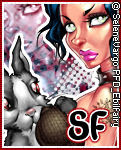
Copy the canvas & paste as a new layer minamise for now (well be using this for the avatar)
Copy & paste your tube as a new layer - position where you think it looks best.
Selections - Select All - Floadt - Defloat - Selections - Modify - Expand 3.
New Raster Layer floodfill with #ffffff - Selections - Select None.
Layers - Arrange move down.
Make sure your on the top layer of your tag.
New Raster Later floodfill with #ffffff
Selections - Select all - Selections - Modify - Contract by 5
Press the small delete key on your keyboard (or use your eraser tool)
Selections - Select None
New Raster Later floodfill with #ffffff
Selections - Select all - Selections - Modify - Contract by 3
Press the small delete key on your keyboard (or use your eraser tool)
Selections - Select None
Effects - Texture Effects - Blinds
Add your copyright.
If your not going to animate - Layers - Merge - Merge Visible
Save as JPEG
Animation.
Copy & paste background into Animation Shop.
There are 8 frames in the animation I used so I duplicated the background 8 times.
(quick way of doing this is hold ctrl & press L - keep pressing L until you have the correct amount of frames)
Edit - Select All
On Missy_burstanimation - Edit - Select All - Copy
Back to your canvas - Edit - Paste - Into Seleted Frames - move until you have it where you think you want it - then click on the canvas.
I wanted the animation on both sides of my tubes - if you'd like to do this - click on Missy_burstanimation
Make sure all the layers are seleted - Animation - Mirror - Edit - Select All - Copy.
Back to your canvas - Edit - Paste - Into Seleted Frames - move until you have it where you think you want it.
Then click on the canvas.
Animation - View.
If you like how it looks move on to the next step - if not just undo & try again until you have something you like.
Back in PSP close off the background of your tag.
Edit - Copy - Copy Merged - Paste into Animation Shop.
Duplicated so you have 8 frames.
Edit - Select All - Copy.
Make sure all the layers with the animation are selected - Edit - Paste - Into Selected Frames.
Save as gif.
Duplicate it & close off the original (only if you want to save a blank copy)
Edit - Select All
Back in PSP type out your name - I used Babalu & added a gradient glow.
Copy & paste into Animation Shop - duplicate so you have 8 frames.
Edit - Select All - Copy
On your tag - Edit - Paste - Into Selected Frames - move to where you think it looks best.
Save as gif
*****
Avatar
120 x 150 canvas.
Back to the canvas we left aside earlier.
Copy & paste it as a new layer - move around until you have something you like showing in the avatar
Copy & paste your tube as a new layer (follow the same steps as before to add the white boarder)
Make sure your on the top layer of your tag.
New Raster Later floodfill with #ffffff
Selections - Select all - Selections - Modify - Contract by 4
Press the small delete key on your keyboard (or use your eraser tool)
Selections - Select None
New Raster Later floodfill with #ffffff
Selections - Select all - Selections - Modify - Contract by 2
Press the small delete key on your keyboard (or use your eraser tool)
Selections - Select None
Effects - Texture Effects - Blinds
Add copyright save as JPEG
Labels:Forum Set,FTU Tutorial,SeleneVargo
Subscribe to:
Post Comments
(Atom)


0 comments:
Post a Comment