About Me

- ebilfairy
- Hi I'm Sandra (also go by ebilfairy) I'm 38. Living with my parents, younger sister, her daughter Bella and one dog called Kiki.
Monday, 13 February 2012
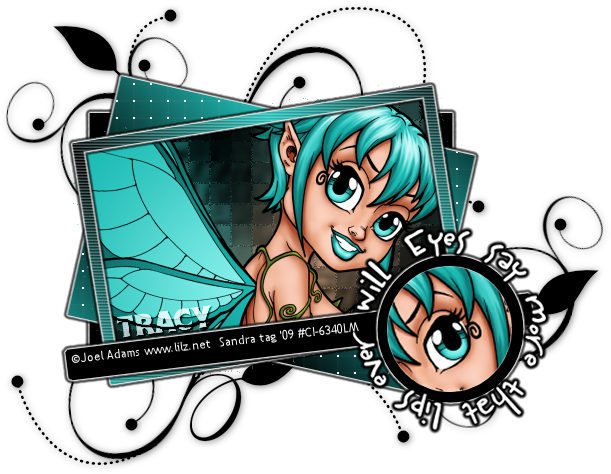
FTU Tutorial - All in the Eyes
*Supplies Needed*
MisfitsTemplate5_ByRachel09 get it over at the Creative Misfits Blog
My wordart (optional)
Tube of choice I'm using the art of Joel Adams you must purchase a license to use his work.
You can purchase his tube at Creative Designs Outlet
Filters Needed
Eye Candy 5 (Impact) - Gradient Glow
*****
*Lets get started*
Open MisfitsTemplate5_ByRachel09
shift + d to duplicate the template - close off the original
Image - canvas size - 650 x 650
delete copyright - BlackCirle2 and GreyCircle layers
BlackRectangle
Gradiantglow with the following settings

GreyRectangle
selections - select all - float - defloat
New layer flood fill with gradient of choice.
I used foreground #21beb7 - background #000000 with these settings

Effects - texture effects - weave

White Rectangle
selections - select all - float - defloat
New layer flood fill with gradient of choice or the gradient used before.
copy and paste your tube as a new layer, place where you think it looks best
selections invert - hit your delete key - selections - select none.
duplicate your tube on the origional tube layer adjust - blur - gaussian - blur Radius 30
Effects - texture effects - texture

Effects - texture effects - Mosaic Antique with these settings

Frame
Selections- select all - float - defloat
New layer fill with gradient we used before
Effects - texture effect - blinds

Selections - select none
Gradiantglow same settings we used before
Stripe
Selections- select all - float - defloat
New layer fill with black or a color of choice
Selections - select none
Gradiantglow same settings we used before
WhiteCircle
Selections - select all - float - defloat
copy & paste your tube as a new layer position the part you want showing inside the marching ants
selection invert - hit your delete key - selections select none
Black Circle
Gradient glow same settings we used before
Add whatever text you would like or you can use the words I've provided.
Copy & paste your doodle art as a new layer and send to the bottom of the canvas.
Drop shadow of choice.
I used Vertical 1 - Horizontal 1 - Opacity 50 - Blur 10
Add name in a font of choice
Add copyright
Resize to your liking.
Layers - merge - merge visible
Save as png or JPEG
Subscribe to:
Post Comments
(Atom)
My Blinkie

I CT For


0 comments:
Post a Comment