About Me

- ebilfairy
- Hi I'm Sandra (also go by ebilfairy) I'm 38. Living with my parents, younger sister, her daughter Bella and one dog called Kiki.
Shout Out
Followers
Sunday, 12 February 2012
FTU Tutorial - NCIS


This tutorial was written by me on 12th of February 2012
*Supplies*
Tube of choice - I'm using the awesome work of Arthur Crowe. You must have a license to use his work.
The tube I've used is from his new store Arthur Crowes Factory
Texture of choice. I've used texture 5 from Vix PSP
Fonts GAMECUBEN and Will&Grace
Plugins
*Lets Get Started*
File - New - New Image 650x200
File - New - New Image 650x200
Make a gradient with 2 colors from your tube.
I used Foreground #000000 - Background #8c248b
Floodfill your canvas with the gradient.
Copy & paster your tube as a new layer - duplicate 4 times and position as shown
Once you have the tubes in position merge them all together.
Duplicate the tubes layer.
On the origional apply xero - radiance
On the duplicate tube layer - Adjust - Blur - Gaussizn Blur 3
Change the blend mode of the layer to Screen and lower the opacity to 60
Copy and paste Vix_Texture5 as a new layer (or whatever texture your using)
Change the blend mode to screen and lower the opacity to 24.
Now you can move it about until your happy with how it looks.
Activate your text tool. Font GAMECUBEN - size 36 - type out NCIS 3 times.
Objects - Align - Center in Canvas - lower the opacity to 50%
*Edit - Copy - Copy Merged.
Edit - Paste - Paste as New Image.
Leave for now.*
Back to your main canvas.
Copy and paste your tube - I resized 80% -Duplicate.
On the duplicate - Adjust - Blur - Gaussian Blur 3
Change the blend mode to Screen - lower the opacity to 62%
New Raster Layer - Floodfill with #ffffff
Selections - Select All - Selections - Modify - 7
Press the Small delete key on your keyboard or use your eraser tool to get rid of the excess white.
Adjust - Add/Remove Noise - Add Noise
Selections - Select All - Selections - Modify - 5
Press the small delete key again.
Selections Select None.
Effects - Xero - Radiance - Same settings as before.
Add your name and copyright.
Save as JPEG
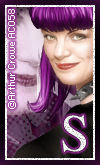
Avatar
New Canvas 100 x 165
Copy and paste the canvas we made earlier, as a new layer.
Move about until you have something you like showing.
Copy and paste your tube as a new layer - position and duplicate.
On the duplicate - Adjust - Blur - Gaussian Blur 3.
Change the blend mode to Screen and lower the opacity to 62
New Raster Layer - Floodfill with #ffffff
Selections - Select All - Selections - Modify - 7
Press the Small delete key on your keyboard or use your eraser tool to get rid of the excess white.
Adjust - Add/Remove Noise - Add Noise same as before.
New Raster Layer - Floodfill with you Gradient.
Selections - Select All - Selections - Modify - 5
Press the small delete key again.
Selections Select None.
Effects - Xero - Radiance - Same settings as before.
********
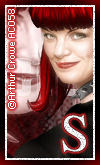
Here's the same tag in different colors.
Red


Labels:Arthur Crowe,Forum Set,FTU Tutorial
Subscribe to:
Post Comments
(Atom)


0 comments:
Post a Comment